Mastering the Stovetop Moka Pot Brewing Method: A Practical Guide to Consistent Results
Most people who own a moka pot have made exactly one good cup with it. They remember that morning: the kitchen smelled like a Milan cafe, the brew came out dark and sweet, and for a brief moment they thought they had figured it out. Then the next three attempts produced something closer to burnt water, or a sludgy mess, or a pot that sputtered and hissed like a broken radiator. The stovetop moka pot brewing method is not difficult, but it is unforgiving. It has no thermostat, no flow meter, no pressure gauge. Every variable is managed by the person holding the pot, and small mistakes compound quickly.
The gap between that one good cup and consistent daily results has nothing to do with talent or expensive beans. It comes down to understanding which variables matter most, in what order to control them, and how to read the signals the pot gives you during the brew. This is not a physics lecture. It is a field explanation for someone who wants their moka pot to work every morning without drama.
Choosing Water That Supports Extraction Rather Than Fights It
Water is the invisible variable. It makes up more than 98 percent of what ends up in the cup, yet most people fill the moka pot from whatever tap is closest without a second thought. The mineral content of that water has a direct, measurable effect on how coffee dissolves into it.
Calcium and magnesium are the two ions that matter most. Magnesium binds to the organic acids and aromatic compounds in coffee and pulls them into solution. Water with a moderate mineral load, roughly 50 to 150 parts per million of total dissolved solids, extracts a balanced cup. Below that range, in very soft or distilled water, the extraction mechanism stalls. The brew tastes flat, thin, and lifeless, no matter how good the beans are. Above 250 ppm, the water is so loaded with minerals that it competes with the coffee for flavor space, producing a chalky, bitter cup and leaving scale deposits on the inside of the boiler.
The stovetop moka pot brewing method is more sensitive to water chemistry than drip or pour-over because of the high brewing temperature. At 100 to 110 degrees Celsius, bitter-tasting compounds dissolve more readily. If the water already carries a heavy mineral load, those dissolved solids buffer the acidity of the coffee and push the cup toward harshness. A simple activated carbon filter on the kitchen tap strips out chlorine and reduces mineral variability without removing everything. Bottled spring water with a known mineral profile works too. The point is not perfection; it is repeatability. Once the water variable is fixed, every other change you make to the brew can be isolated and evaluated on its own.
Grinder Selection and Why Particle Size Distribution Is the Master Variable
Of all the adjustments available to someone practicing the stovetop moka pot brewing method, grind size has the largest effect on the cup. The coffee bed inside the filter basket is a porous medium. Water pushed by vapor pressure must travel through the interstitial spaces between particles. The size of those spaces, and therefore the resistance to flow, is determined almost entirely by the grind.
A blade grinder is the wrong tool for this job. It shatters beans into an unpredictable mix of dust and boulders. The fine particles pack together and choke the flow, while the coarse particles extract poorly. The result is simultaneous over-extraction and under-extraction in the same brew, which tastes both bitter and sour at once. A burr grinder, even an inexpensive hand grinder with ceramic burrs, produces a much narrower particle size distribution. That uniformity is what gives the user control.
The target range for the stovetop moka pot brewing method is finer than drip coffee but coarser than espresso. If you run the ground coffee between your thumb and forefinger, it should feel like fine table salt: slightly gritty, with individual particles distinguishable, but not powdery. On a typical burr grinder with numbered settings, this usually falls one or two clicks finer than the drip setting. The exact number depends on the grinder, which is why the first bag of beans with a new grinder requires a few calibration brews. Start in the middle of the range, taste the result, and adjust one click at a time. Sour and thin means go finer. Bitter and drying means go coarser. The stovetop moka pot brewing method responds to single-click changes in grind setting, so there is no need for dramatic swings.
Dosing the Basket: Volume, Leveling, and the Case Against Tamping
The filter basket in a moka pot has a fixed volume. Unlike an espresso machine where dose is weighed to the tenth of a gram, the moka pot works on a fill-to-the-rim principle. The basket should be completely full of ground coffee, leveled flat with a gentle shake or a finger sweep. No more, no less.
Overfilling, where a mound of grounds rises above the rim of the basket, creates a dense core that the screw-on upper chamber compresses when the pot is assembled. Water cannot penetrate this compressed mass evenly. It finds the path of least resistance around the edges, channeling through the perimeter of the bed and leaving the center untouched. The result is a cup that tastes simultaneously bitter from the over-extracted edges and hollow from the under-extracted center.
Underfilling leaves headspace between the coffee and the upper filter plate. Water pools in this gap before passing through the screen, creating a pre-infusion chamber that was never designed into the system. The extraction becomes erratic.
The stovetop moka pot brewing method does not benefit from tamping. This is one of the most common mistakes made by people transitioning from espresso. In a pump-driven espresso machine, 9 bars of pressure can overcome a compacted bed. A moka pot generates 1 to 2 bars. A tamped bed at that pressure either stalls the flow entirely, causing the safety valve to release, or forces the water to find a single weak point in the puck, creating a violent channel. The coffee should be leveled, not compressed. A gentle tap on the counter to settle the grounds is fine. A firm press with a tamper is not.
The Seal System: Gaskets, Threads, and Mechanical Longevity
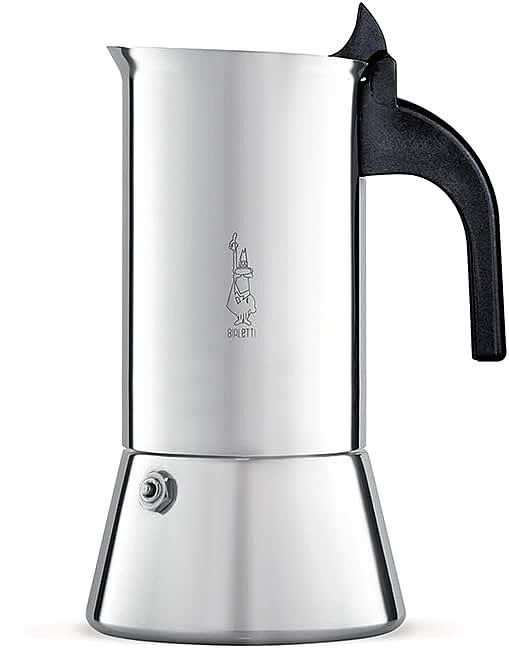
The rubber gasket is the least glamorous part of the moka pot, and the one most likely to ruin a brew when it fails. The gasket sits between the upper and lower chambers, creating the pressure seal that makes the entire brewing process possible. If the seal leaks, pressure escapes before it can push water through the coffee. The result is a weak, under-extracted brew accompanied by steam hissing from the joint between the chambers.
Gaskets degrade over time. Heat, pressure, and contact with coffee oils cause the rubber to harden and lose elasticity. A fresh gasket is pliable and compresses easily when the pot is screwed together. A worn gasket feels stiff, and the pot requires noticeably more force to seal. When you start muscling the pot closed, the gasket is past its replacement point.
Replacement frequency depends on usage. A pot brewed daily will need a new gasket every 6 to 12 months. The signs of a failing gasket are unmistakable: steam escaping from the seam, difficulty achieving a tight seal, or a faint rubber taste in the coffee. Keeping a spare gasket on hand is affordable insurance. When replacing, clean the threads thoroughly. Coffee oil residue in the threads prevents the gasket from seating properly, which shortens the life of even a brand-new gasket.
The filter plate, the small perforated metal disc that sits above the gasket, also deserves attention. Its holes can clog with fine coffee particles and oil residue, increasing flow resistance and altering the pressure profile of the brew. Poking each hole clear with a pin is tedious but effective. Alternatively, soaking the plate in a solution of hot water and a coffee-specific cleaning powder dissolves the organic buildup without damaging the metal.
Heat Application: Flame Size, Preheating, and the Response Curve
Heat is the engine of the stovetop moka pot brewing method. The user controls it, and the brew responds in real time. Too much heat and the water flashes into steam before it has time to extract evenly. Too little and the process stalls, producing a tepid, underdeveloped cup.
On a gas stove, the flame diameter should match the pot base or sit slightly inside it. A flame that licks up the sides of the lower chamber heats the walls directly, which warms the upper chamber prematurely. The collected coffee sits in a hot metal vessel and continues to cook, developing bitter, ashy flavors that were not extracted from the grounds but thermally created in the cup. A diffuser plate, a flat metal disc placed between the burner and the pot, spreads the flame evenly and protects the pot walls. This is especially useful for smaller 2- and 3-cup pots where the base diameter is narrow.
Preheating the water before filling the boiler is a technique that divides opinion but has a clear mechanical rationale. Cold water in the boiler means the pot sits on the heat for several minutes before extraction begins. During that time, the boiler walls and the bottom of the coffee basket are being heated by conduction. By the time the water reaches extraction temperature, the coffee grounds are already warm, and some volatile aromatics have begun to escape from the beans into the air inside the basket. Starting with hot water, roughly 70 degrees Celsius, shortens the time on the stove, reduces the total heat energy delivered to the coffee before extraction, and tightens the brew window. The stovetop moka pot brewing method with preheated water is faster, more predictable, and less prone to the slow creep of over-extraction that comes from a long, cold start.
Electric stoves present a different challenge. Their coils and glass tops have thermal inertia. When you turn the heat down, the element stays hot for a while. This makes mid-brew adjustments sluggish. The practical workaround is to start at a lower heat setting than you think you need and, if the flow is too slow, increase the heat slightly rather than trying to rescue an overheated pot by turning the heat down.
Reading the Brew: Sound, Sight, and the Three Phases
The stovetop moka pot brewing method announces its progress through three distinct phases, each with its own sound and visual signal. Learning to recognize these phases is the single skill that most separates a consistent brewer from an inconsistent one.
Phase one is silence. The pot sits on the heat, and nothing visible happens for one to three minutes, depending on the starting water temperature and heat intensity. Internally, the air and water vapor above the liquid are expanding, building pressure. Some practitioners hear a faint, low hissing during this phase as the first wisps of steam push into the funnel stem.
Phase two is the flow. A stream of dark, syrupy coffee rises from the central column and begins to fill the upper chamber. The sound is a soft, continuous gurgle. This is the main extraction window. The stream starts deep brown, nearly black, and gradually lightens as the soluble compounds in the coffee bed are depleted. The transition from dark to amber to pale tan marks the progression of extraction. The sweet spot is in the first two-thirds of this flow, when the stream is still a rich brown. Once it turns amber, the extraction is entering diminishing returns territory.
Phase three is the sputter. The sound shifts abruptly from a smooth gurgle to a rapid, percussive chugging. Steam and air are now rushing through the nearly spent coffee bed, and what comes out is thin, bitter, and dominated by astringent tannins. The rule is absolute: remove the pot from the heat the instant the sputter begins. Some brewers place the base of the pot under cold running water to halt the extraction immediately. Others simply lift the pot off the burner and pour. Either approach works. What does not work is leaving the pot on the heat through the sputter, hoping to get every last drop. Those last drops are the ones that ruin the cup.
Roast Level, Origin, and Recipe Adaptation
Not all coffee behaves the same in a moka pot. The stovetop moka pot brewing method needs to be adjusted based on what is in the basket.
Dark roasts are more porous than light roasts. The extended time at high temperature during roasting breaks down the cellulose structure of the bean, making soluble compounds more accessible to hot water. A dark roast extracted under the same parameters as a light roast will taste over-extracted: ashy, bitter, and flat. The practical adjustment is to coarsen the grind by one or two clicks and, if possible, reduce the heat slightly. This shortens the contact time and reduces the peak extraction temperature, pulling the cup back from the edge of bitterness.
Light roasts present the opposite problem. The intact cellulose structure holds onto its soluble compounds more tightly. The same grind and heat settings that produce a balanced cup with a dark roast will under-extract a light roast, leaving it sour, thin, and sharp. Finer grind, slightly higher heat, and in some cases a longer brew time (achieved by lowering the heat to delay the onset of flow) bring more sweetness and body into the cup.
Single-origin coffees from different growing regions carry their own extraction personalities. Ethiopian naturals, processed with the fruit still attached to the bean, tend to produce intensely fruity, fermented flavors that can tip into unpleasant sourness if under-extracted in a moka pot. Colombian washed coffees, clean and balanced by nature, are forgiving across a wider range of parameters. Brazilian pulped naturals sit somewhere in between, with a nutty sweetness that rewards a medium grind and moderate heat.
The stovetop moka pot brewing method is not one recipe. It is a framework. The variables are always the same: water, grind, dose, heat, and timing. But the specific settings within that framework shift with every new bag of beans. A brewer who keeps a mental or written log of what worked with each coffee will develop an intuition that makes future calibration faster.
The Five Most Common Failures and What Causes Each One
When the stovetop moka pot brewing method goes wrong, the failure mode points directly to the cause. There is no mystery here, only a missing connection between symptom and variable.
Sour, watery coffee. The extraction was too low. The grind is too coarse, the heat was too low, or both. Go one click finer on the grinder and increase the heat slightly. If the coffee was a light roast, go two clicks finer.
Bitter, astringent coffee with a dry, puckering finish. Over-extraction. The grind is too fine, the heat was too high, or the pot was left on the burner through the sputter phase. Coarsen the grind, lower the heat, and remove the pot earlier. If the coffee was a dark roast, the grind almost certainly needs to be coarser than you think.
Steam hissing from the joint between the chambers. The gasket is worn, the threads are clogged with coffee residue, or the pot was not screwed together tightly enough. Disassemble, clean the threads, inspect the gasket, and reassemble with firm hand pressure. If the gasket is stiff or cracked, replace it.
No flow at all, or flow that starts and stops. The grind is too fine, creating a bed that the moka pot's modest pressure cannot push through. The safety valve on the lower chamber may release steam as a pressure relief. Remove the pot from the heat, let it cool, disassemble, and coarsen the grind significantly. A tamped bed can also cause this; never tamp in a moka pot.
Coffee that tastes metallic or off. If the pot is aluminum and has been washed with detergent, the protective seasoning layer has been stripped. Brew a few throwaway cycles with spent grounds to rebuild it. If the pot is stainless steel, the metallic taste is more likely from stale coffee oil residue in the gasket or threads. Deep clean the entire assembly.
Maintenance Routines That Keep Flavor Clean Over Time
A moka pot is a low-maintenance device, but zero maintenance is not the same as low maintenance. The stovetop moka pot brewing method produces a concentrated, oil-rich brew, and those oils deposit themselves on every surface they touch.
After each brew, disassemble the pot and rinse all three components under hot running water. For stainless steel pots, a mild detergent is safe and recommended. For aluminum pots, skip the detergent and use hot water and a soft cloth only. The dark patina that develops on aluminum is not dirt; it is a seasoning layer of polymerized coffee oils that protects the metal from reacting with acidic coffee compounds. Stripping it with soap exposes fresh aluminum, which can impart a metallic taste to the next several brews.
Once a week, remove the gasket and filter plate. Soak them in hot water with a coffee-specific cleaning powder or a mixture of baking soda and water. Scrub the threads of both chambers with a soft brush to remove oil buildup. Rinse everything thoroughly and dry before reassembling. Moisture trapped between the gasket and the metal promotes corrosion at the contact surface, even on stainless steel.
Once a month, inspect the safety valve on the lower chamber. Press the valve pin with a fingertip; it should move freely and spring back. A stuck safety valve is a genuine hazard, not just a flavor issue. If the valve is clogged with scale or coffee residue, clean it with a pin and flush the chamber with hot water.
Replace the gasket every 6 to 12 months with daily use. Replace the filter plate if the perforations show visible corrosion or if cleaning no longer restores free flow through the holes. These parts are inexpensive and universally available. A moka pot with fresh seals, clean threads, and a clear safety valve will produce the same cup today that it produced on the first day. A neglected pot will produce progressively worse coffee, and the decline is gradual enough that the owner may not notice until the cup tastes nothing like it used to.
The stovetop moka pot brewing method rewards a specific kind of attention. Not obsessive precision, not expensive equipment, just a willingness to pay attention to what the pot is telling you and to keep the mechanical parts clean. The one good cup that every moka pot owner remembers is not a fluke. It is what happens when all the variables line up by accident. Consistency is what happens when you line them up on purpose.