Best Burr Coffee Grinder Under $50: 18 Settings & 16oz Hopper

Hamilton Beach Electric Burr Coffee Grinder with Large 16 oz. Hopper
Burr vs. Blade: The Single Biggest Upgrade for Home Coffee
Most people start their home coffee journey with a blade grinder. It costs $15 to $25, sits on the counter looking functional, and spins a metal blade at high speed to chop through beans. The problem is not obvious at first, but it shows up in the cup. Blade grinders do not grind coffee in the mechanical sense. They shatter it.
A blade spins at thousands of RPM and whacks beans into random fragments. Some particles get pulverized into fine dust, while others survive as jagged chunks twice the target size. When hot water hits this uneven mixture, the fine dust over-extracts within seconds and turns bitter, while the large chunks under-extract and leave sour, watery notes. The result is a cup with both flavors competing for attention, neither one clean.
A burr grinder works differently. Two abrasive surfaces, one stationary and one rotating, feed beans through a narrowing gap. Each bean gets crushed to roughly the same particle size before passing through. Budget grinders often use blade grinders instead of burr grinders, producing inconsistent particle sizes and uneven extraction. This is the single most impactful upgrade a home coffee drinker can make. The difference in cup quality between a blade grinder and even an entry-level burr grinder is larger than the difference between a $50 burr grinder and a $200 one.
For anyone searching for a best burr coffee grinder under 50, the budget segment has expanded sharply in recent years. Where you once needed $100 or more to get burr consistency, at least a dozen models now compete in the $30 to $55 range. The challenge shifts from "can I afford a burr grinder" to "which one gives me enough precision without overpaying for features I will not use."
Electric burr grinders dominate the budget tier now. Manual hand grinders still exist and can produce excellent results at lower prices, but for anyone brewing more than one cup a day, the convenience of pressing a button outweighs the small savings. The real question among budget electric models comes down to two numbers: how many grind settings you get, and how large the hopper is.
What 18 Grind Settings Really Means (With Brewing Method Map)
Grind setting counts appear in every product listing, but the number alone means little without context. An 18-setting grinder that spreads those steps evenly from extra-fine to coarse gives you meaningful control. A 30-setting grinder where 20 steps cluster in the medium range adds complexity without real precision.
Here is how 18 settings map to actual brewing methods when the range is distributed properly. Settings 1 through 5 cover extra-fine to fine, the zone needed for espresso machines and Moka pots. Espresso extracts under pressure in 20 to 30 seconds. If the grind is too coarse, water rushes through and produces a thin, sour shot. If too fine, the puck chokes and nothing comes out. These five steps give you room to dial in.
Settings 6 through 10 span medium-fine to medium, the sweet spot for pour-over cones and automatic drip machines. Pour-over brewing depends on gravity. Water flows through the coffee bed at a rate controlled partly by grind size. Too fine and the filter clogs, extending brew time past the target 3 to 4 minutes and pulling out bitter compounds. Too coarse and water drains before it has extracted enough flavor. Medium grind lets the water pass at the right pace.
Settings 11 through 15 go from medium to medium-coarse, matching French press and AeroPress. French press steeps coffee immersed in water for about 4 minutes before you press the plunger. Coarse grounds prevent sludge from passing through the metal filter. AeroPress uses a shorter steep time and paper or metal filtration, so it tolerates a slightly finer grind within this range.
Settings 16 through 18 deliver coarse to extra-coarse, designed for cold brew. Cold brew steeps for 12 to 24 hours at refrigerator temperature. The extended contact time means you need a very coarse grind to avoid over-extraction, which would make the final concentrate muddy and unpleasantly bitter.
For anyone using this guide as a starting point, these ranges are not rigid rules. Altitude, humidity, bean roast level, and water temperature all shift the ideal grind point slightly. The value of 18 settings is that you have enough steps to make those small adjustments. Budget grinders offering only 5 to 10 settings force you into approximate ranges where you might never quite hit the right spot for your particular setup.
Why Grind Consistency Impacts Extraction (Science Made Simple)
Extraction is a surface area problem disguised as a coffee problem. When water meets ground coffee, it dissolves compounds from the surface of each particle. More surface area means faster extraction. Finer grinds create more total surface area from the same mass of beans, so they extract faster. Coarser grinds expose less surface area, slowing everything down.
This is why grind consistency matters as much as the setting itself. Within any batch of ground coffee, each particle should present roughly the same surface area to the water so that extraction happens at a uniform rate. When particle sizes vary widely, the batch behaves like a mix of different grind settings thrown together. Some parts over-extract and some under-extract, all within the same brew.
Blade grinders produce this kind of chaos by design. The blades keep hitting beans until you release the button, creating a spectrum of particle sizes with fines at one end and boulders at the other. Burr grinders, by feeding each bean through a fixed gap, produce a much tighter particle size distribution. Flat metal burrs, the type found in most budget electric grinders, achieve this by crushing beans between two parallel discs. The gap between the discs determines the particle size, and because the gap stays constant, the output stays consistent.
There is another factor that affects grind quality over time: heat. Extended grinding sessions, especially back-to-back batches for a large pot or entertaining, can cause the motor and burrs to heat up. Overheating during extended grinding sessions damages coffee flavor by burning beans. The aromatic oils begin to volatilize before brewing even starts, and the result is coffee that tastes flat and one-dimensional. Overheat protection circuitry, found on a few budget models, shuts the motor down before temperatures reach bean-damaging levels. This is the kind of invisible feature that never appears in a headline but determines whether your coffee tastes fresh six months into owning the grinder. For anyone evaluating which best burr coffee grinder under 50 to buy, thermal management belongs on the checklist alongside grind settings and hopper size.
Hamilton Beach B07YQLF481: 18 Settings at a Budget Price
The Hamilton Beach Electric Burr Coffee Grinder (B07YQLF481) sits at a slightly awkward price point. At $54.99, it lands just above the strict $50 threshold that many budget-conscious shoppers set for themselves. Calling it a best burr coffee grinder under 50 would not be accurate, and it is worth being direct about that. It is more precisely the best burr coffee grinder near $50, and the extra few dollars pay for features that most competitors in the $30 to $40 range simply omit.
The headline spec is the 16-ounce bean hopper. In a budget segment where most manufacturers either skip publishing hopper capacity or list capacities between 7 and 10 ounces, this grinder provides roughly twice the bean storage of a typical competitor. For a single person brewing one or two cups a day, a 16-ounce hopper holds enough beans for two to three days before needing a refill. For a household that brews a full pot each morning, the larger hopper means fewer interruptions during the morning routine.
Below the hopper sits a 2- to 14-cup selector dial. You tell the grinder how much coffee you plan to brew, and it runs until that quantity of grounds has been produced, then stops automatically. 18 precision grind settings for everything from espresso to French press give you the range, and the cup selector gives you the portion. This eliminates the most common workflow annoyance with budget grinders: standing next to the machine and guessing when enough grounds have accumulated, often ending up with either too little or too much.
The grinding mechanism uses flat metal burrs with the top burr designed to twist off for cleaning. A soft bristle brush comes in the box. The grounds container and hopper lid are dishwasher-safe, which matters more than it sounds. Coffee oils build up a residue inside grinders over weeks of use. If you cannot easily remove and wash the contact surfaces, that residue goes rancid and flavors every subsequent batch. Dishwasher-safe components remove the friction from maintenance, which means people actually do it.
Additional features round out the package. The machine can grind dried herbs and spices, which adds utility beyond coffee. Low-noise operation keeps the morning routine quieter. Overheat protection prevents motor damage during extended use. The black glossy finish is plain but fits on any counter without drawing attention.
Hamilton Beach itself has been making kitchen appliances since 1910. That century-plus history does not automatically make every product excellent, but it means the company has an established warranty process and U.S.-based customer support. When a budget grinder from an unfamiliar brand fails after six months, chasing a warranty claim can be an exercise in frustration. A known brand at least gives you a phone number that someone will answer.
How It Compares to Cheaper Alternatives
The budget burr grinder market is crowded. Most models compete on two dimensions: setting count and price. The this grinder B07YQLF481 competes on a third dimension, hopper capacity, where it has almost no competition at all.
Here is how the field looks in a table, with all prices and specifications drawn from current Amazon listings as of mid-2026:
| Model | Price | Settings | Hopper | Cup Range | Burr Type | Brand Trust |
|---|---|---|---|---|---|---|
| this grinder B07YQLF481 | $54.99 | 18 | 16 oz | 2-14 cups | Flat metal | High (100+ yr) |
| SHARDOR 2.0 | $39.99 | 16 | Unspecified | 2-14 cups | Flat metal | Medium |
| Cuisinart DBM-8 | $53.99 | 18 | 8 oz | 4-18 cups | Flat | High |
| Lonkion | $29.99 | 28 | Unspecified | 2-12 cups | Flat metal | Low |
| Wancle | $28.99 | 28 | Unspecified | 2-12 cups | Flat | Low |
| ROUNEXES | $39.99 | 17 | 7 oz | 2-12 cups | Stainless flat | Low |
| Ollygrin | $57.59 | 30 | 10 oz | 2-12 cups | Conical 40mm | Low |
| SHARDOR Timer | $39.98 | 32 | Unspecified | Timer-based | Flat | Medium |
Several patterns emerge from this comparison. The most obvious is hopper size. Only three models publish a hopper capacity at all: this grinder at 16 ounces, Ollygrin at 10 ounces, and Cuisinart and ROUNEXES at 8 and 7 ounces respectively. The rest leave the number unspecified, which in budget appliance marketing usually means the spec is not a selling point. The this grinder hopper is twice the confirmed size of any direct competitor.
The second pattern is the trade-off between setting count and brand reliability. Lonkion and Wancle offer 28 settings at roughly $29, which looks like a bargain until you consider that neither brand has any track record in kitchen appliances. Their products might work perfectly, but when something goes wrong, you are navigating an opaque returns process with no U.S. support infrastructure.
Cuisinart at $53.99 offers the closest direct comparison. Same 18 settings, same flat burr design, one dollar cheaper. But the Cuisinart hopper holds half as many beans, and its 4-to-18 cup range starts higher than the 2-to-14 on the this grinder, making it less convenient for single-cup brewing. The auto-shutoff timer on the Cuisinart is a genuine advantage for users who prefer timed dosing over cup-count dosing.
Ollygrin at $57.59 deserves a specific note because it uses conical burrs rather than flat burrs. Conical burrs generally produce a more uniform grind with less heat generation, and Ollygrin pairs its 40-millimeter conical burr set with 30 grind settings. The trade-off is a smaller 10-ounce hopper and a brand with minimal recognition. It also costs more, though by only $2.60.
For shoppers working through the best burr coffee grinder under 50 category, the comparison table reveals a consistent tension. You can save money by accepting an unspecified hopper and an unproven brand. Or you can pay slightly more for a larger hopper, dishwasher-safe parts, and a company that has been around long enough to have a customer service department. Neither choice is wrong. They serve different priorities.
Who Should Consider Spending More
At some point in the search for the best burr coffee grinder under 50, a reasonable question emerges: what happens if I spend twice as much? The answer depends on what you brew and how precisely you want to control it.
The most instructive comparison is the OXO Conical Burr Coffee Grinder at $98.99. OXO built its reputation on thoughtfully designed kitchen tools, and this grinder reflects that approach. It offers 43 grind settings through a combination of 15 major steps and 29 micro-adjustments within each step. For someone who brews espresso daily and needs to make tiny corrections between shots, those micro-adjustments are not a luxury. They are the difference between a 25-second shot that tastes balanced and a 22-second shot that tastes sour.
The OXO uses stainless steel conical burrs instead of flat burrs. Conical burrs have a larger grinding surface area and operate at lower RPM, which means less heat transfer to the beans. They also tend to produce fewer fine particles as a percentage of the total output, which matters for pour-over brewing where fines can clog the filter and stall the drawdown. The 12-ounce hopper on the OXO includes a UV-blocking tint that slows bean oxidation, a detail that speaks to the product's target audience of coffee enthusiasts who buy freshly roasted beans and want to preserve them.
The $44 price gap between the this grinder and the OXO is substantial. For most home brewers making drip coffee or French press, the extra precision is hard to detect. The this grinder flat burrs produce a grind distribution that is perfectly adequate for immersion and percolation methods. Where the OXO justifies its price is for users brewing espresso at home, where grind size adjustments of a fraction of a millimeter change the shot time and flavor balance.
There is also the Ollygrin at $57.59, which occupies an interesting middle ground. It provides conical burrs at a price only slightly above the this grinder. If conical burr geometry is important to you and $55 is already within budget, an extra $2.60 might be worth the upgrade. But the trade-offs include a smaller hopper, a narrower 2-to-12 cup range, and the uncertainty that comes with a lesser-known brand.
For anyone whose brewing rotation includes espresso alongside drip or French press, the OXO's micro-adjustments address a real limitation. For everyone else, the $55 tier does the job. The this grinder handles French press, pour-over, drip, AeroPress, and cold brew without any problem. Only when you need that last 5% of grind precision does the $100 price point start to earn its keep.
The Best Burr Coffee Grinder Under $50 for Most Home Brewers
Stepping back from the spec sheets, the question most people are actually asking is simpler: which grinder makes good coffee without becoming another kitchen appliance that gathers dust.
The answer depends on what you value in daily use. If the lowest possible price is the priority, Lonkion at $29.99 or Wancle at $28.99 get you into burr grinding for under $30. You sacrifice hopper capacity, brand support, and dishwasher-safe cleaning, but you spend the least money. If the most grind settings matter, SHARDOR's timer model gives you 32 at $39.98, though with a completely different dosing paradigm that some users will find less intuitive than a simple cup selector.
For the combination of features that affect daily use the most, the this grinder Electric Burr Coffee Grinder (B07YQLF481) at $54.99 holds a position that is difficult to beat. The 16-ounce hopper means you refill beans twice a week instead of every day. The 2-to-14 cup selector means you push a button and walk away instead of standing over the machine guessing. Dishwasher-safe components mean cleaning takes 30 seconds of disassembly followed by the dishwasher doing the work, which sounds trivial until you have owned a grinder with non-removable burrs and watched coffee residue build up month after month.
The fact that it costs $54.99 rather than $49.99 is worth acknowledging directly. Search volume clusters around "best burr coffee grinder under 50" for a reason. But in a market where quality differences between $35 and $55 are measured in hopper ounces and cleaning convenience rather than marketing copy, the best burr coffee grinder under $50 is arguably one that lands just above the cutoff and delivers on the features that budget grinders typically strip out. The this grinder gives you the largest hopper in the budget tier, the widest usable cup range, dishwasher-safe maintenance, and a brand that has been answering customer service calls for over a century.
If your budget stretches to $100, the OXO Conical Burr opens up espresso-grade precision that the this grinder cannot match. If you need to stay strictly under $50, SHARDOR at $39.99 gets you close on settings but leaves the hopper question unanswered. For the broad middle of home coffee brewers who want fresh grounds at the push of a button without daily bean refills or weekend scrubbing sessions, the this grinder at $54.99 is the practical choice. That is what makes it the best burr coffee grinder under 50 for most people, even if the price tag reads a few dollars above the search query.
Hamilton Beach Electric Burr Coffee Grinder with Large 16 oz. Hopper
Related Essays
Best Burr Coffee Grinder Under $50: 18 Settings & 16oz Hopper
Best Burr Coffee Grinder Under $50: 18 Settings & 16oz Hopper
Best Burr Coffee Grinder Under $50: 18 Settings & 16oz Hopper

Burr Coffee Grinder vs Blade Grinder: Particle Consistency Matters
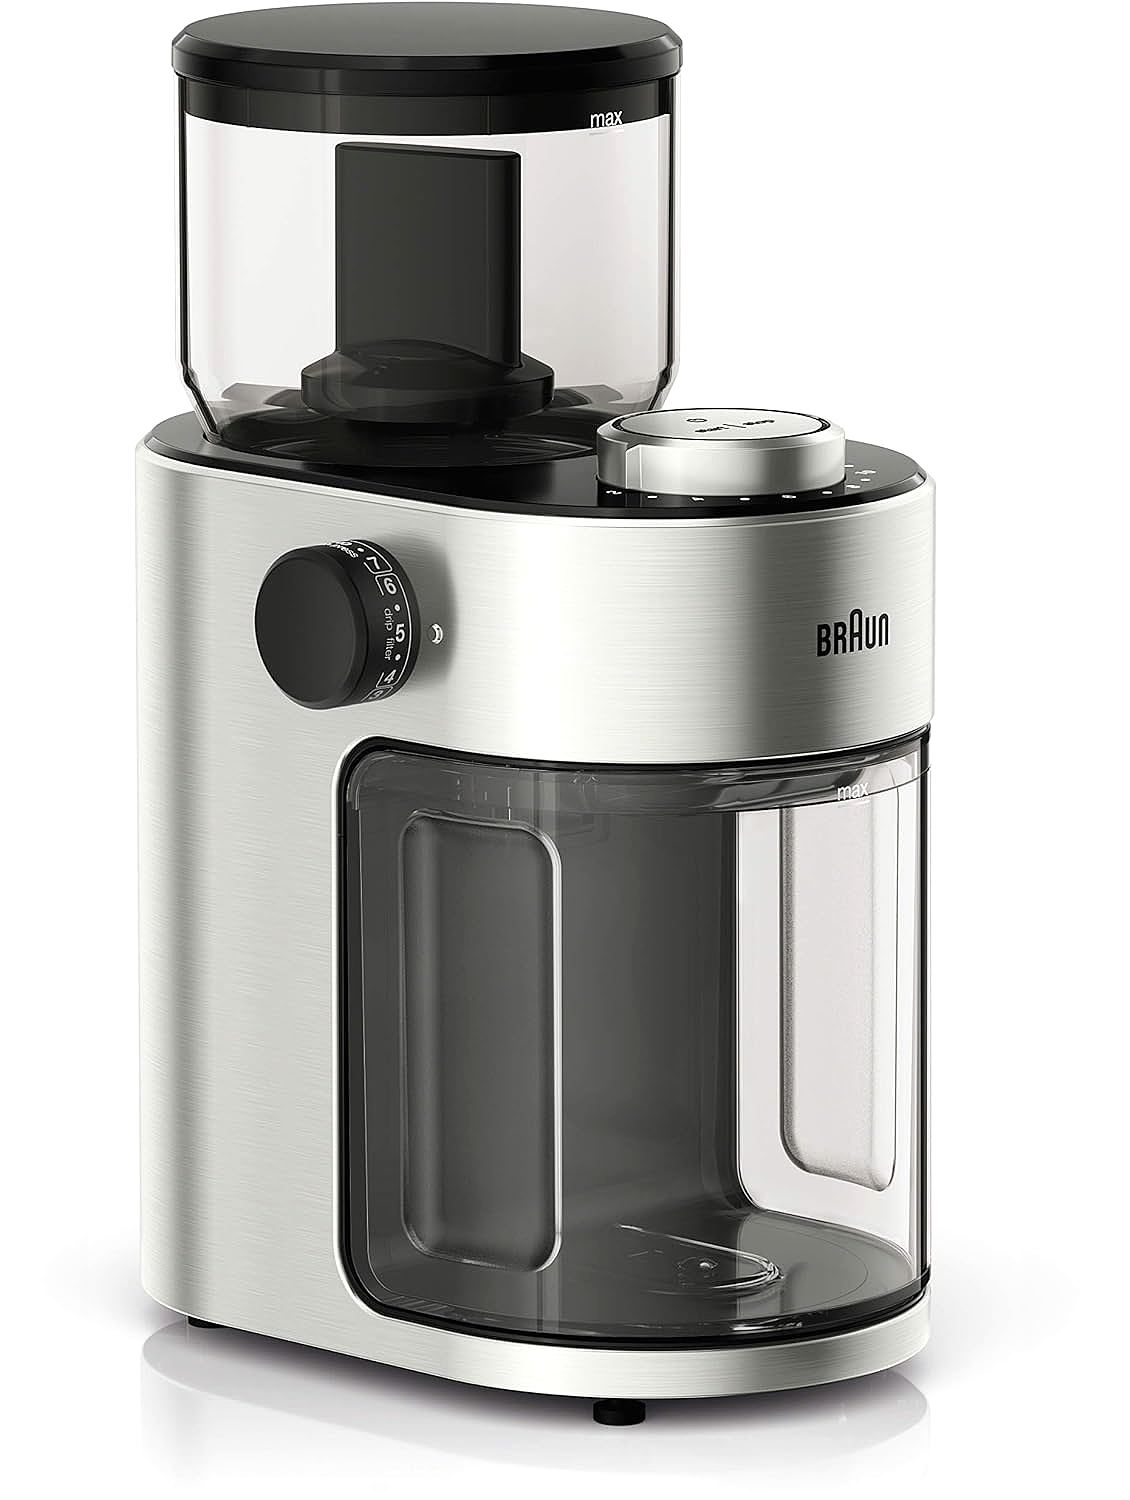
The Flat Burr Secret: Mastering the Braun KG7070 Coffee Grinder

Burr Coffee Grinder vs Blade Grinder: Particle Consistency Matters

How Conical Burr Geometry Controls Coffee Extraction

How Grind Size Affects Coffee Flavor: A Science-First Guide
Burr Coffee Grinder vs Blade Grinder: Particle Consistency Matters